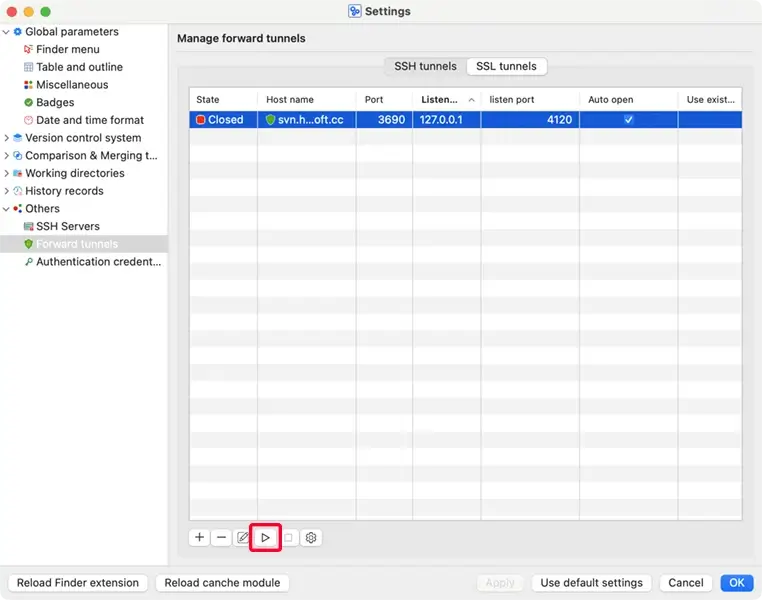
There are two types of tunnels to choose from, ssh tunnel or ssl tunnel:
Different from svn+ssh://, SSH tunnel uses svn:// to access the svnserve server. Like
svn+ssh://, you need a system account on the server in order to create the tunnel, but this account
does not need to have file access permissions to the repositories, nor does it need to configure
svn+ssh:// on the server side. You need to start the svnserve service, use the passwd
and authz files of the repository to create users and set their permissions to access the
repositories. There is no need to open the svnserve listening port on the firewall, but you need to open the ssh
port.
Configure server:
Install Subversion, configure the svnserve service, use the passwd and
authz files of the repository to create users and set their permissions to access the
repositories.
Configure sshd service to allow port forwarding: Edit sshd configuration file, ensure
AllowTcpForwarding is enabled.
AllowTcpForwarding yes
If the sshd configuration file is changed, restart the sshd service.
Optional, create a new system user in order to create tunnel.
Configure macSvn:
Click the macSvn icon in the status bar, or in the toolbar of a Finder window, then select "Settings ..." menu item to open the "Settings" window.
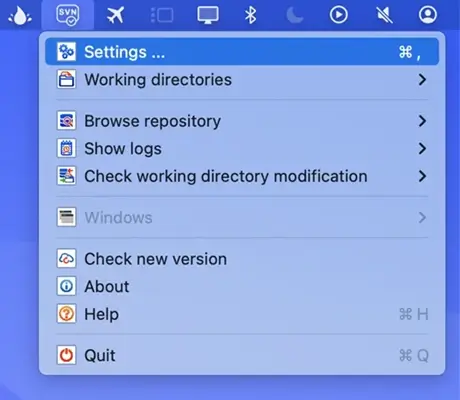
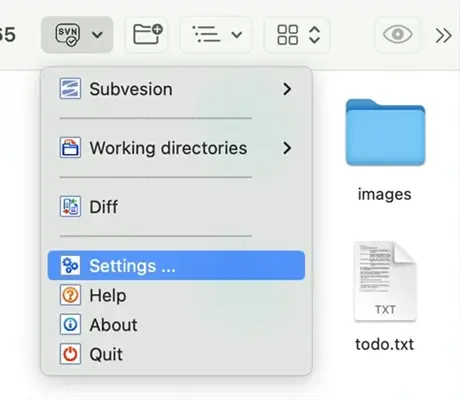
Select Others / Forward tunnels on the left side of the window, and select the "SSH tunnels" tabsheet in right side of the window. Click the "✚"(Add ...) button to create a new SSH tunnel.
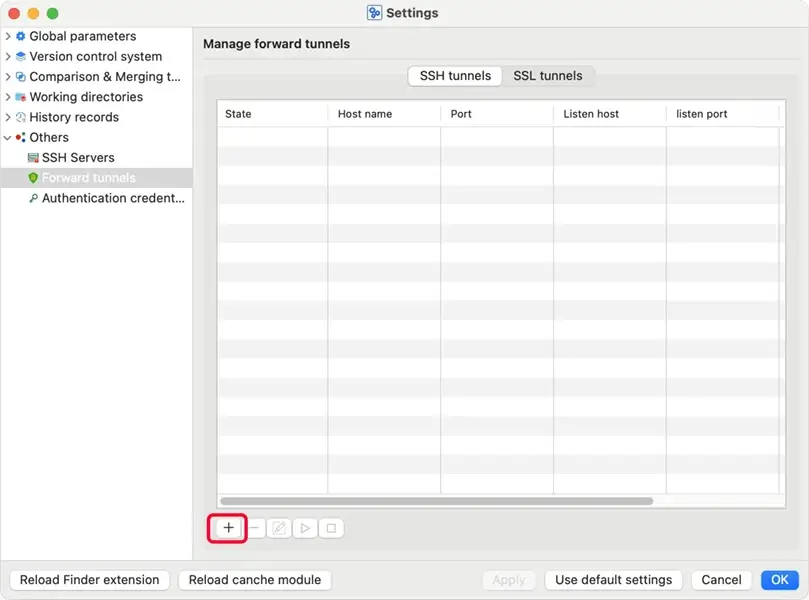
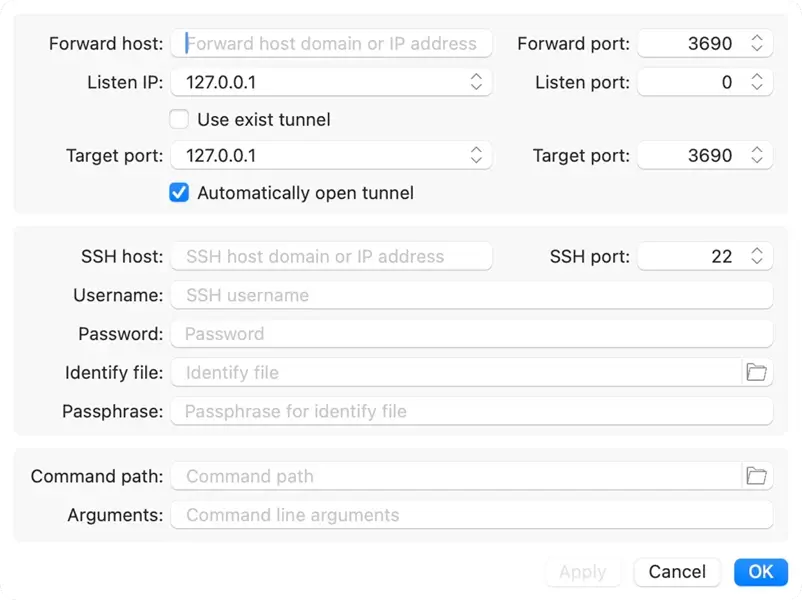
Forward host: Specifies a domain name or IP address to form an URL used to access the repository through the tunnel.
Forward port: Specifies a port number to form an URL used to access the
repository through the tunnel. If the port is 3690, it can be omitted in the
URL.
Listen IP: Select the listening address of the tunnel client, usually
127.0.0.1 or [::1].
Listen port: Specifies an idle TCP port as the listening port for the
tunnel client. You can specify 0 to use a random port number.
Target host: Specifies the domain name or IP address of the svnserver
server. Since svnserve and the sshd server are usually installed on the same computer, this
value can be set to 127.0.0.1 or [::1].
Target port: Enter the listening port of your svnserver server. It's
3690 by default.
Automatically open tunnel: If this checkbox is checked, the tunnel will be started automatically when starting macSvn.
SSH host: Specifies the domain or IP address of destination SSH server.
SSH port: SSH port to connect to on the remote host. It's
22 by default.
Username: Specifies the user to log in as on the remote machine. If it is specified as empty, a dialog box will be displayed when opening the tunnel, prompting you to enter a user name.
Password: If using Password authentication, specify the password here, otherwise a dialog box will be displayed to enter the password when opening the tunnel.
Identify file: If using Public key authentication, select a file from which the identity (private key) for public key authentication is read.
Passphrase: If your private key is protected with a passphrase, you can enter the passphrase here, otherwise a dialog box will be displayed to enter the passphrase when opening the tunnel.
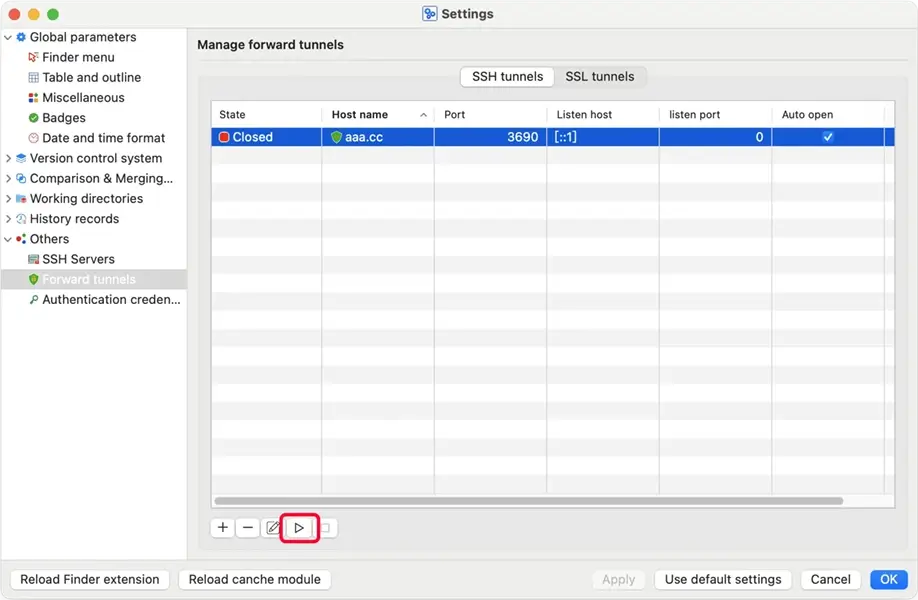
Click the "►"(Start) button to open this tunnel, and then you can use the
URL "svn://forward_domain:forward_port/ path_to_repository" to access your repository
in macSvn. If the forward_port is 3690, the port number can be omitted in the
URL.
Using ssl tunnel to access the svnserve service is faster than https://, You don't need to install Apache on the server, you only need to install and start the svnserve service, and use the passwd and authz files of the repository to create users and set their permissions to access the repositories, which is simpler than using .htaccess to configure users and access permissions for Apache. Unlike ssh tunnel, ssl tunnel does not require a system account. There is no need to open the svnserve listening port on the firewall, but you need to open another TCP port to access your repository through the SSL tunnel.
Configure server:
Install Subversion, configure the svnserve service, use the passwd and
authz files of the repository to create users and set their permissions to access the
repositories.
Install the sslTunnel or Stunnel, and configure a ssl tunnel:
If you use the sslTunnel, edit the configuration file to create a forwarding tunnel. For example:
    {
      "user": "ssltunnel",              # Need to create the user/group to run sslTunnel service
      "group": "ssltunnel",             # Need to create the user/group to run sslTunnel service
      "tunnels": [
        {
          "listen": {
            "address": "0.0.0.0",       # Listen address of tunnel
            "port": 3691,               # Listen port of tunnel
            "certs": [
              {
                "cert": "server.crt",   # Path to server certificate
                "key": "server.key",    # Path to private key of server certificate
                "passphrase": "...."    # Passphrase of private key (if the key is passpharse protected)
              }
            ],
            "client-auth": "verify",    # verify: Verify client certificate; no: Don't verify client certificate
            "client-verify": "ca",      # ca: Verify the client certificate chain starting from the root CA
                                        # cert: Verify the end-entity (leaf) client certificate
            "ca": [
              "ca.crt"                  # Root CA certificate of client certificates (client-verify is set to 'ca')
                                        # The end-entity (leaf) client certificates (client-verify is set to 'cert')
            ],
              "custom": ""
          }
          "connect": {
            "address": "127.0.0.1",     # Host of svnserve server
            "port": 3690,               # Listen port of svnserve server
            "timeout": 5,
            "tls": false
          }
        }
      ]
    }
If you use the Stunnel, edit the configuration file to create a forwarding tunnel. For example:
    setuid = stunnel4        # Need to create the user/group to run Stunnel service
    setgid = stunnel4        # Need to create the user/group to run Stunnel service
    cert = ./cert.pem        # Path to server certificate
    key = ./key.pem          # Path to private key of server certificate
    verifyChain = yes        # Whether to verify the client certificate chain starting from the root CA
    verifyPeer = no          # Whether to Verify the end-entity (leaf) client certificate
    CAfile = ./ca.cer        # Issuing certificate chain starting with the root CA certificate for all
                             # client certificate (verifyChain = yes).
                             # Or specifies all end-entity (leaf) client certificates (verifyChain = no)
    client = no              # Run as server

    [svn]
    accept = 127.0.0.1:3690  # Host and listen port of svnserve server
    connect = 3691           # Listen address and port of tunnel
Open the listen port of ssl tunnel on the firewall of server.
Start the sslTunnel or Stunnel service.
Configure macSvn:
Click the macSvn icon in the status bar, or in the toolbar of a Finder window, then select "Settings ..." menu item to open the "Settings" window.


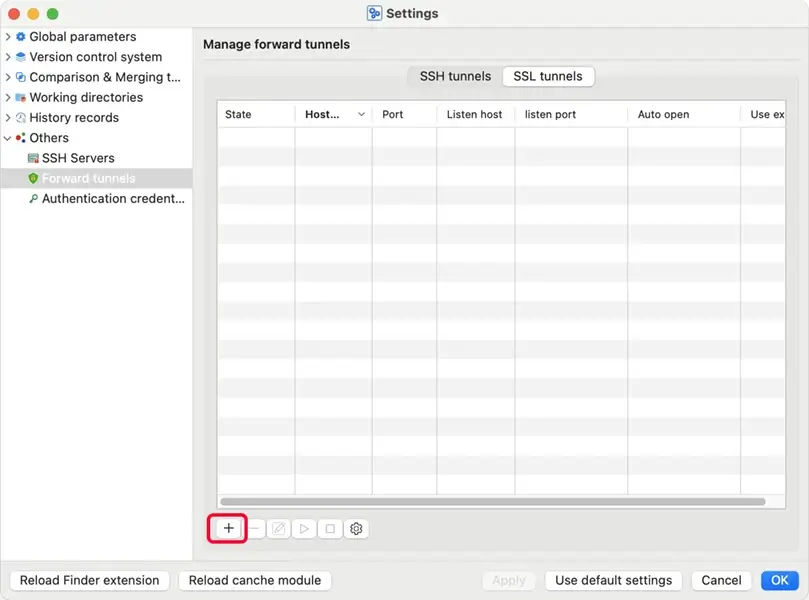
Select Others / Forward tunnels on the left side of the window, and select the "SSL tunnels" tabsheet in right side of the window. Click the "✚"(Add ...) button to create a new SSL tunnel.
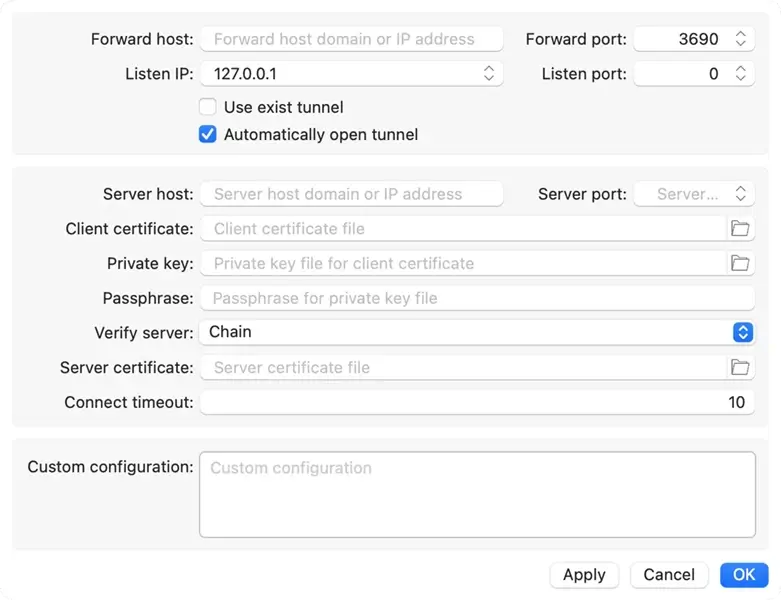
Forward host: Specifies a domain name or IP address to form an URL used to access the repository through the tunnel.
Forward port: Specifies a port number to form an URL used to access the repository through the tunnel. If the port is 3690, it can be omitted in the URL.
Listen IP: Select the listening address of the tunnel client, usually
127.0.0.1 or [::1].
Listen port: Specifies an idle TCP port as the listening port for the tunnel client. You can specify 0 to use a random port number.
Automatically open tunnel: If this checkbox is checked, the tunnel will be started automatically when starting macSvn.
Server host: Specifies the domain or IP address of the destination sslTunnel or Stunnel server (needs to match server side certificate).
Server port: The listening port of sslTunnel or Stunnel server on the remote host to connect to. You need to open this port on the server firewall.
Client certificate: If sslTunnel or Stunnel server require a client certificate, specifies the client certificate file.
Private key: If sslTunnel or Stunnel server require a client certificate, specifies the private key file for your client certificate.
Passphrase: If your private key is protected with a passphrase, you can enter the passphrase here, otherwise a dialog box will be displayed to enter the passphrase when opening the tunnel.
Verify server: Specifies whether to verify the server certificate when establishing a connection:
None: Do not verify server certificate.
Chain: Verify the server certificate chain starting from the root CA.
Peer: Verify the end-entity (leaf) server certificate.
Server certificate: If you need to verify the server certificate and the
sslTunnel or Stunnel server uses a self-signed certificate, specifies the root CA
certificate (Verify server is set to "Chain") or the
end-entity (leaf) server certificate (Verify server is set to
"Peer").
Click the "▶"(Start) button to open this tunnel, and then you can use the URL "svn://forward_source_domain:forward_source_port/ path_to_repository" to access your repository in macSvn. If the forward_source_port is 3690, the port number can be omitted in the URL.
